Overview #
This comprehensive guide will help you enable Google indexing for your registration application hosted on a custom domain. By enabling Google indexing, your registration site becomes visible in search engine results, increasing its discoverability and driving more user traffic. Follow these detailed instructions to set up Google Search Console, verify domain ownership, and submit your registration site for indexing, ensuring maximum visibility and engagement.
Step 1: Prerequisites #
- Ensure you have completed the set up of your registration site with a custom domain. See our registration suite for step by step guides and more information on how to do so.
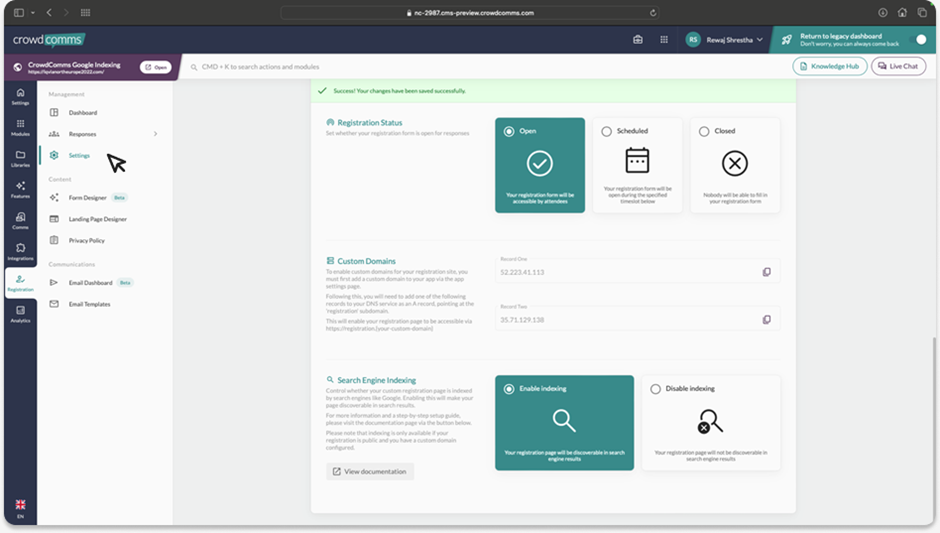
- Navigate to your registration tab and enable the indexing flag in the registration settings of the application.
Step 2: Access Google Search Console #
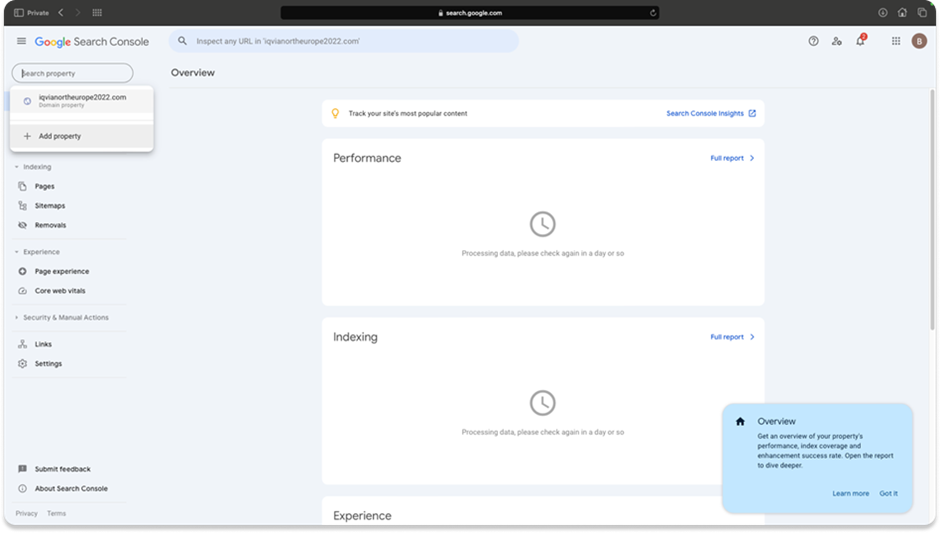
- Using the client’s or CrowdComms’ Google account, navigate to Google Search Console.
- If no domain is already linked to the account, you’ll see a prompt to add one.

- If a domain is already associated, select it or click on ‘Add Property’ to proceed.
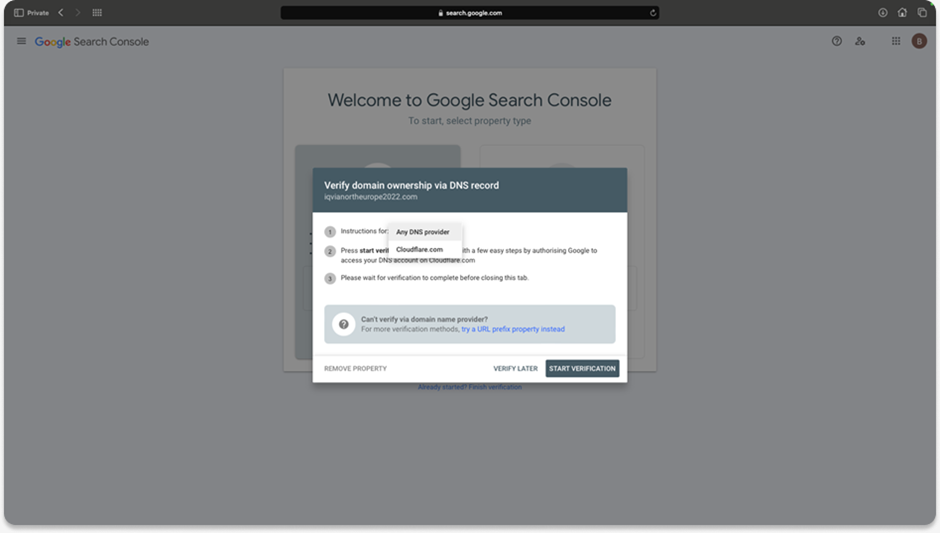
Step 3: Add a New Domain #
- To add a new domain to an already functional Google account, click the domain url on the top left and then ‘Add Property’, and a pop should appear similar to the screen for a new Google Account.
- To add to new google account type the domain name of the custom domain without any subdomains in the ‘Domain’ option.
- You will then be asked to verify you own that domain in the following pop up. Make sure ‘Instructions for’ is set to ‘Any DNS provider’.
- Then proceed to click ‘Copy’ the copy the TXT record value.

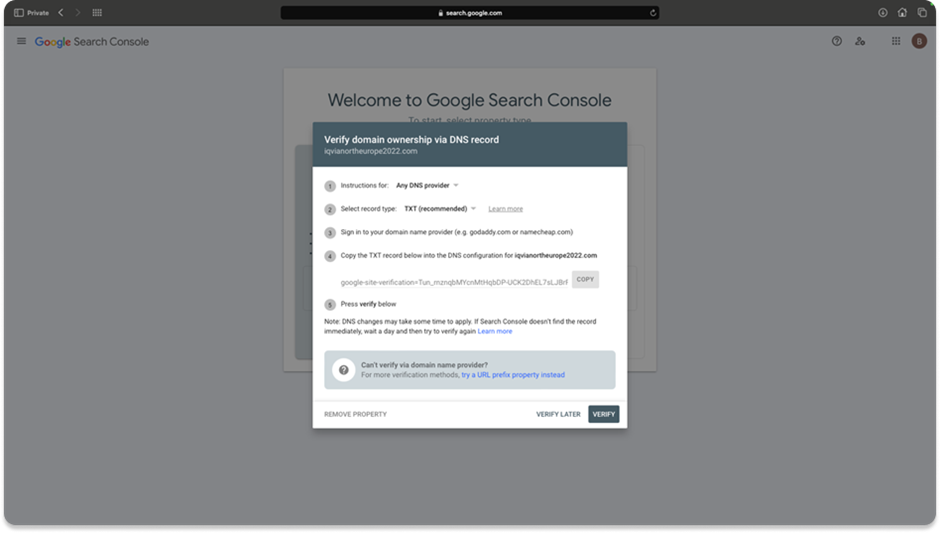
Step 4: Add TXT Record to Your DNS Provider #
- Then open up your DNS provider and add the new TXT record with the name as ‘@’ and the value as the string copied from Google Search Console
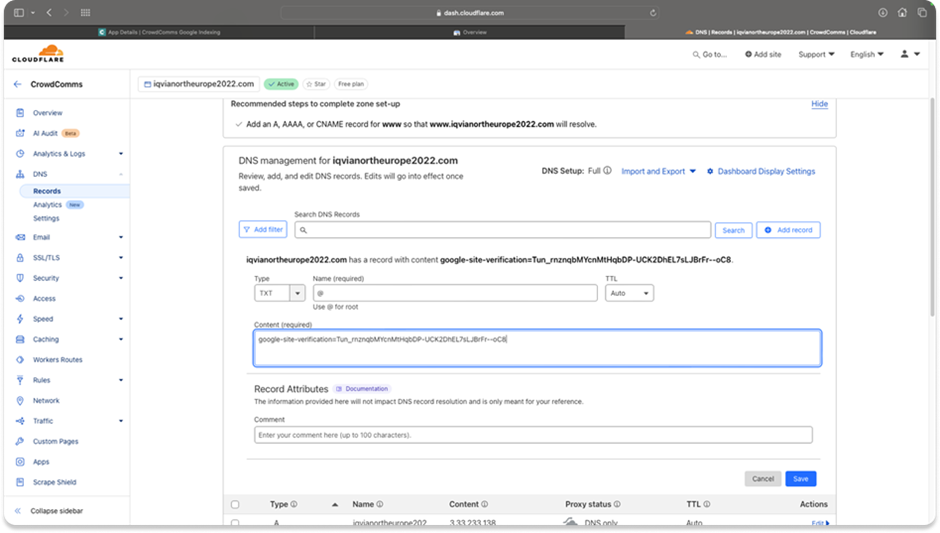
- Shortly after, return to Google Search Console and click verify and you should have the following successful pop up

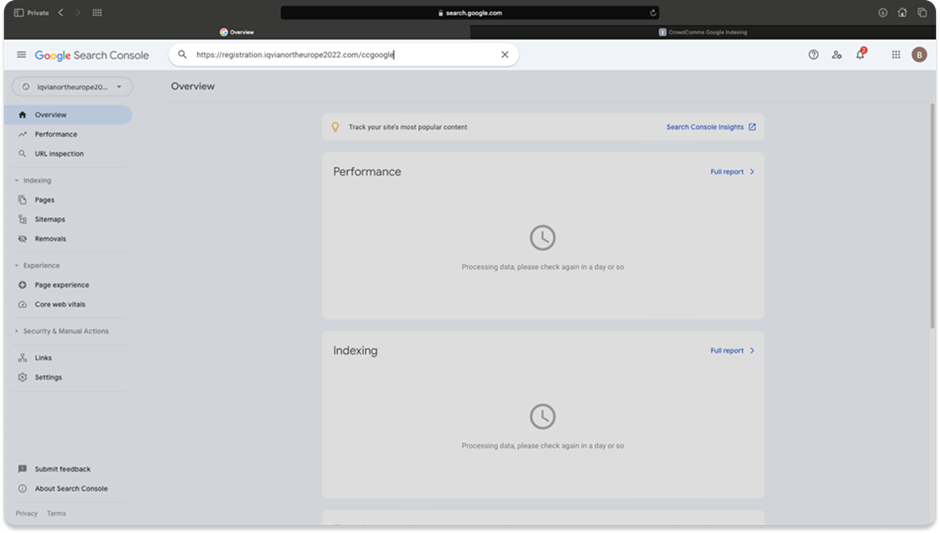
Step 5: Submit the Registration Form for Indexing #
- Now you have access to the domain on Google Search Console, so you will now submit a request for the registration site for indexing.
- At the top, type in the full HTTPS URL of the registration site ALONGSIDE it’s app shortcode as part of it’s path and click enter.
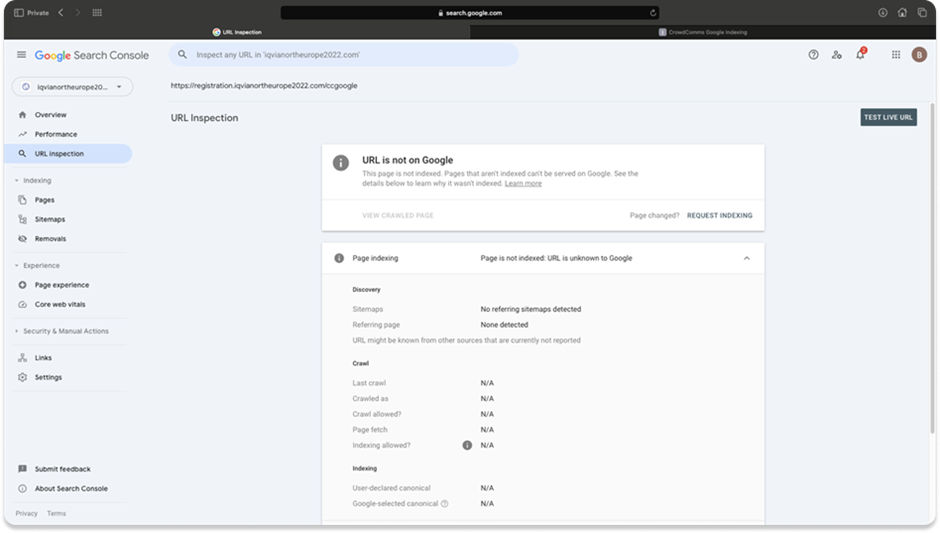
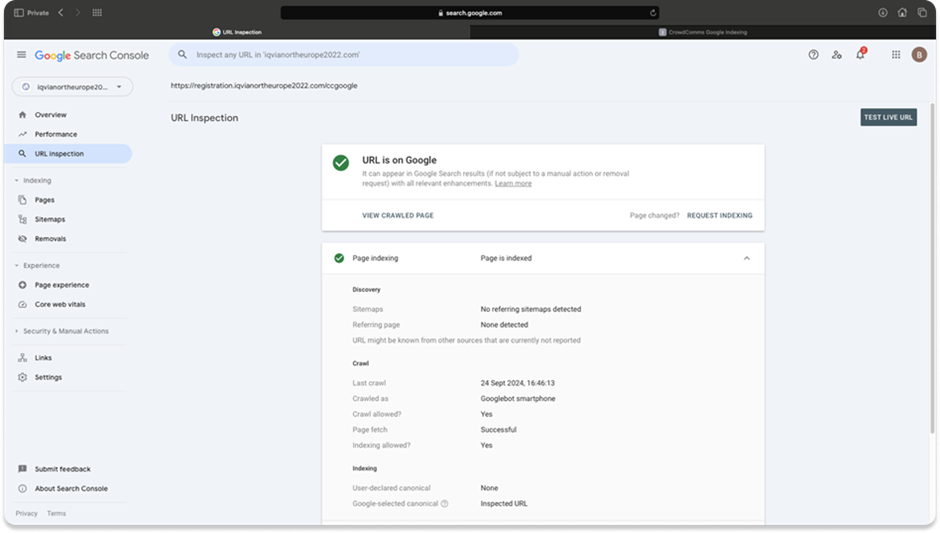
Step 6: Validate the Registration Page #
- Initially the following page should appear, indicating the site has not been indexed by Google.
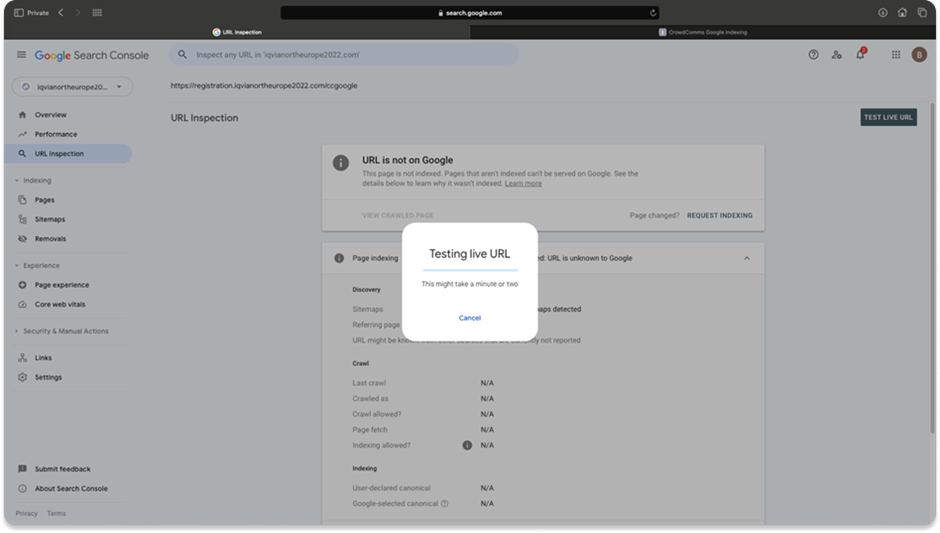
- Next click ‘Test Live URL’ which will make a request to the site.
- You should then see the following page indicating the URL is a valid website
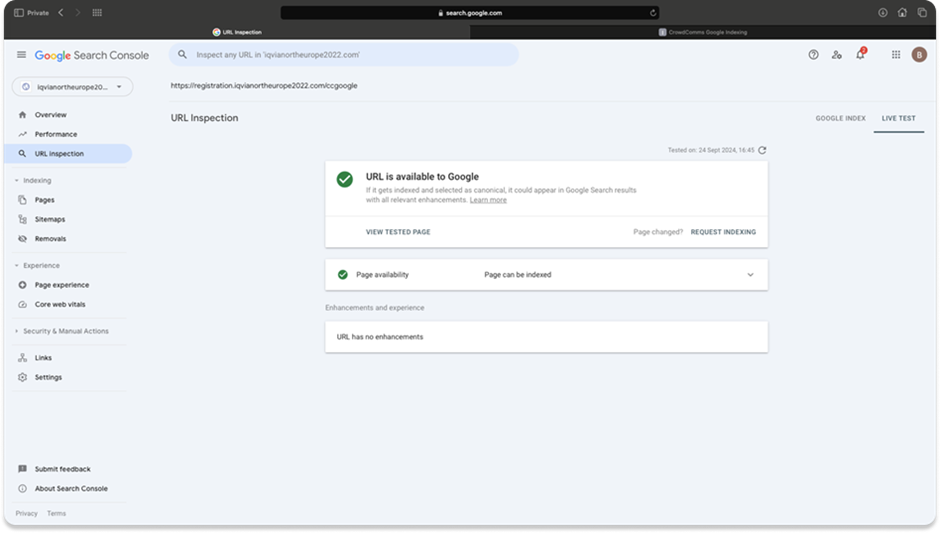
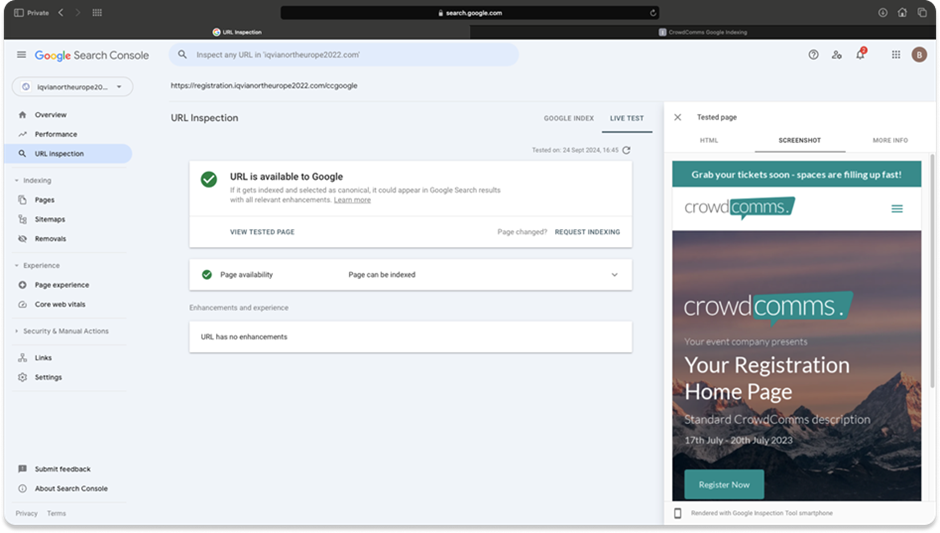
- Click ‘View Tested Page’ and check the screenshot of the registration form to ensure it appears as expected.
Step 7: Request Indexing #
- Click ‘Request Indexing’ to submit the URL for Google’s index.
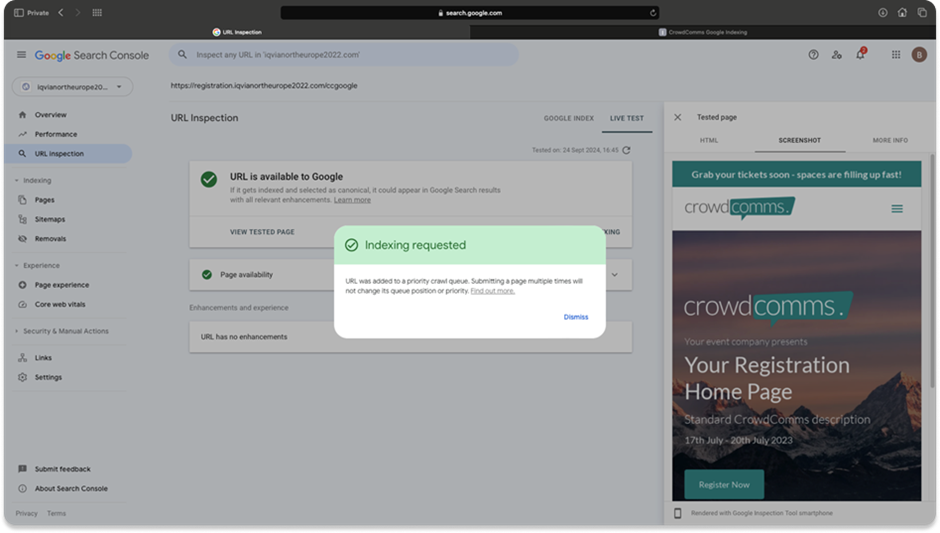
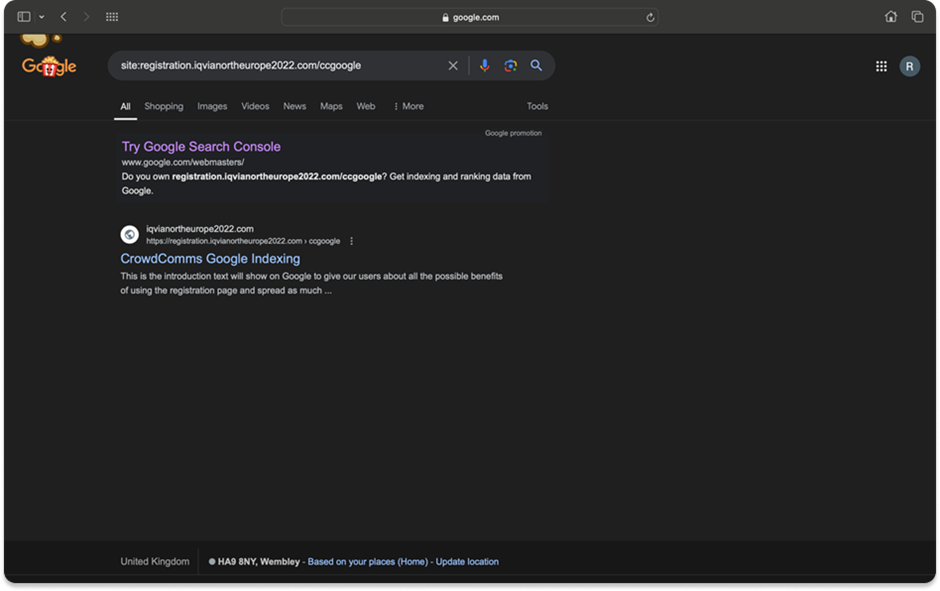
- After a few minutes, by searching back for the registration URL in the top search bar, it should show the following.
Step 8: Monitor Indexing Progress #
- Recheck the URL after a day. The registration page may take a day or more to appear in search results, and app icons will appear once verified by Google.