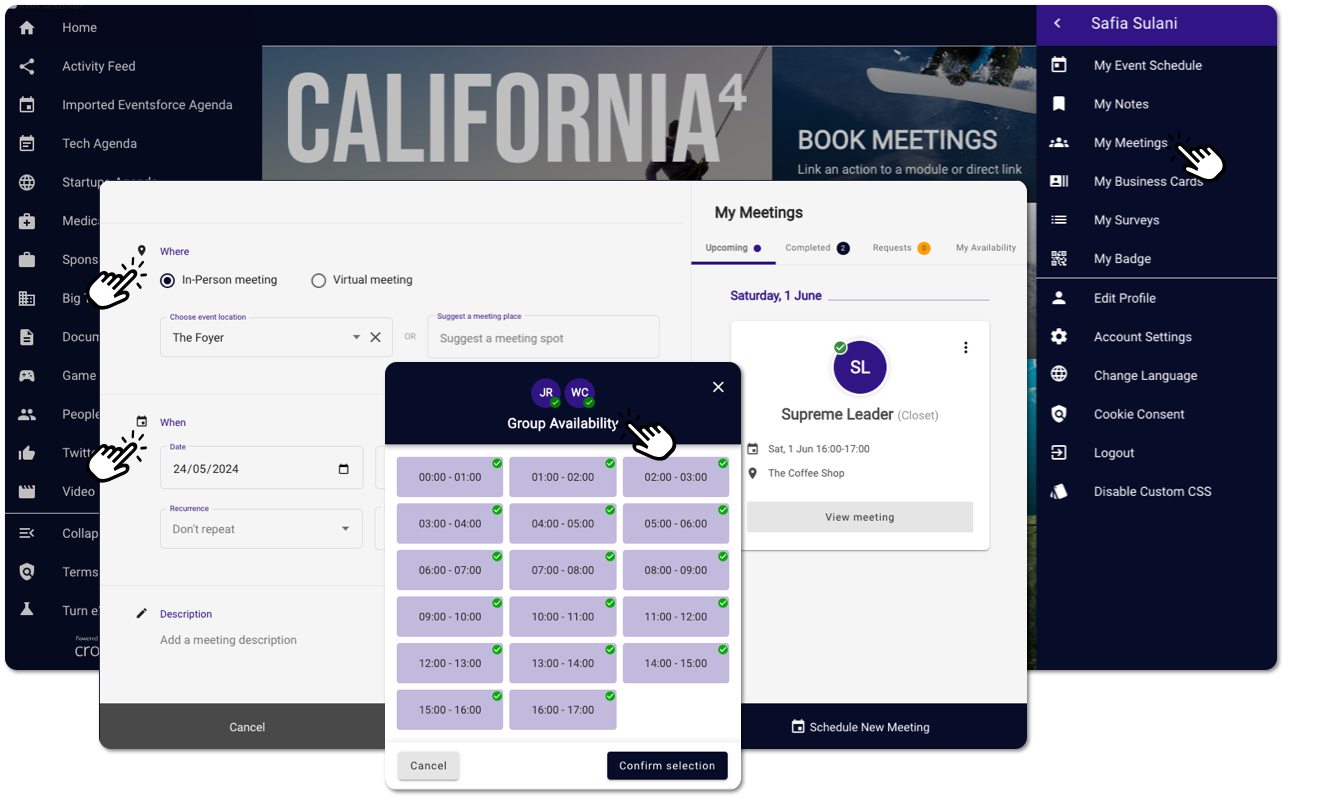
[This enables you to arrange meetings with other delegates within this Event App]
1. There are two ways to create a meeting with other delegates within your Event App.
2. You can either:
a. Go via the right-hand menu, where you can see your initials, and click ‘My Meetings’.
b. Locate the person you want to meet, by searching for them in the Attendee/People list on the left-hand menu, select the person you wish to meet and click on the ‘Schedule Meeting’ button.
3. Either way, you will then be taken to the ‘Create a new meeting’ page with a form for you to populate.
4. The fields are:
a. Subject – Add a subject to your meeting to make it easier for the recipient of your meeting to read the purpose of the meeting.
b. Arrange a meeting with – Start typing the name of the delegate you wish to meet with. You will see a list of users that you can add. Select the appropriate user. If you opted for step 2(b), this field will be pre-populated with the delegate’s name and photo.
b(i). Group Meeting – You can also arrange a meeting with more than one delegate. Click on the ‘Add more people’ to add other delegates to your meeting invite.
c. Where – Depending on the event organiser’s setup, you can either set up an in-person-only meeting, or a virtual-only meeting, or have both options available. Only one selection can be made for a meeting.
i. For an in-person meeting, you can select a location from the ‘Choose event location’ dropdown or you can also suggest a meeting place. The location capacity will be set by your event organiser so only locations with available capacity at your chosen time and date will display.
ii. For a virtual meeting, select ‘Video Meeting’ from the dropdown options.
d. When – You then need to select a date and time for your meeting. The available meeting date(s) will be determined by the event organiser. You can arrange a meeting length of either 5, 10, 15, 20, 30 or 60 minutes or unlimited length, depending on the set-up chosen by the event organiser. The time and date selector will clearly display the participant(s) availability and notify you if there is an overlap in your bookings prompting you to select an alternative time.
e. Message – In this field, you can write a message that you want the person you wish to meet to see. You can write an introduction about yourself and the purpose of the meeting.
5. To restart the form, you can click ‘Cancel’ and it will reset to a blank form.
6. When you’re ready to send your meeting invite, click ‘Send Invitation’.


