Stripe Integration for Paid Ticketing Training Guide
Enhance your event with our Registration Ticketing feature, now integrated with Stripe! This seamless integration enables you to offer paid experiences and products, providing a comprehensive and streamlined experience for your attendees.
Stripe Integration Step-by-Step
- Prerequisites
- Integrating Stripe into CMS
- Tax Rates
- Enabling Receipts
- Unlinking your Stripe Account
- Useful Links

Pre-requisites
If you already have a Stripe Account you will just need the login details to link the account, if you are setting up a new Stripe Account the next steps will require:
- Business Email
- Password
- Authentication App
- Business Address
- Business Type (Sole Trader, PLC, Ltd etc.)
- Legal Name Associated with the Business
- VAT Number
- Contact Details
- Industry Type
- Business Website/URL
- Bank Account Details
Integrating Stripe into the CMS
- Log in to the CMS.
- Navigate to integrations on the left side menu.
- Select the Stripe Icon.
- Click the ‘Connect to Stripe’ button.
- You will be re-directed to Stripe, follow the prompts on screen to link your existing account or set up a new one.
- Once you have completed the prompts, your Stripe account will be linked to the CMS and ready to accept payments via your registration form.
To learn more about how to create paid tickets for your event please see our ticketing guide.
Setting Up Your Tax Rate
To ensure accurate and consistent data reporting, we recommend setting up your tax rate within the CrowdComms CMS. Follow these guidelines to avoid user errors and double taxation:
- Configure Tax Rate in CMS:
- Set your tax rate in the CrowdComms CMS after setting up your Stripe integration. This can be found in Ticketing – payment settings. For information on setting the tax rate in the CMS please see here.
- Stripe Tax Rate Activation:
- Payments will not be processed if there is no active tax rate in Stripe, regardless of the tax rate set in the CMS.
- Once generated, tax rates in Stripe remain “Active” and Stripe will always apply the most recent active tax rate.
- Managing Tax Rates in Stripe:
- If you need to change the tax rate or edit the label, edit it in the CMS and this will flow through to the active rate in Stripe.
By following these steps, you can maintain accurate and consistent tax application across both platforms.
Enabling Receipts
For the customer receipts functionality, please ensure to enable receipts on your Stripe Account. You can find more information on how to enable receipts on Stripe here.
To enable automated receipts, toggle Successful payments on in your Customer emails settings. Stripe only sends receipts to successful and completed payments. If the payment fails or is declined, a receipt will not be sent.
To ensure your customers receive their receipts you will also need to white list the Stripe Domain ‘@stripe.com‘.
For more on white listing please see here.
Unlinking Your Stripe Account
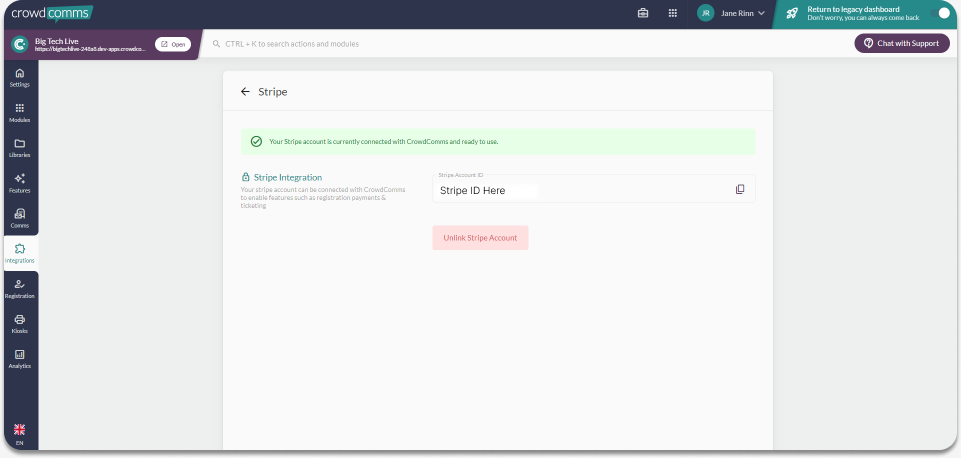
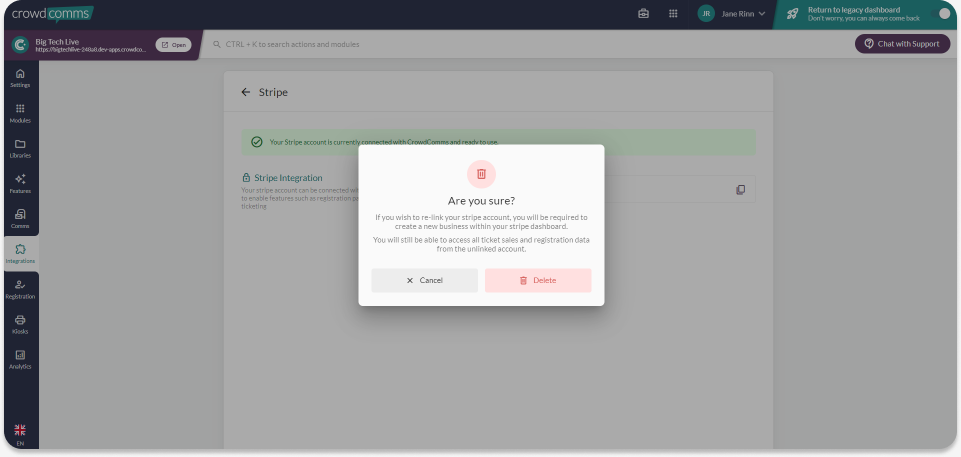
To unlink your Stripe account simply select the unlink account button and your Account ID will be removed from the CMS.


