To begin, go to the ‘Dashboard’, located in the ‘Management’ section of the ‘Registration’ menu.
At the top of the page, you will see four dashboard tiles displaying the following information:
- Not Yet Invited – The total number of users who have not yet been invited to register.
- Not Responded – The total number of users who have been invited but have not responded or registered.
- Not Attending – The number of users who have declined to attend (only displays once the email has been responded to).
- Registered – The total number of users who have successfully registered for the event.
For more information on response management please see here.
Sending the Invitation and Reminder Email #
Before sending invitation emails, you must first add the users to the CMS. Click here to learn how to add users to the CMS. Once a user is added to the CMS through the People Library, any relevant information from their profile will be auto-populated in the registration form.
To check whether there are users who haven’t yet been invited, refer to the number shown in the ‘Not Yet Invited’ tile. If there are users who still need to be invited, simply click on the ‘Send Invite Email’ button to invite them to register.
The same process applies to sending reminder emails.
Sending Emails to Registered Users #
To send emails to users who have already registered for your event, navigate to the ‘Email Dashboard’ within the ‘Communications’ section of the secondary ‘Registration’ menu. Click on the ‘Send New Email’ button in the top right corner.
A pop-up will appear, allowing you to either draft your email from an existing template or create a new one from scratch. Once done, click ‘Submit’.
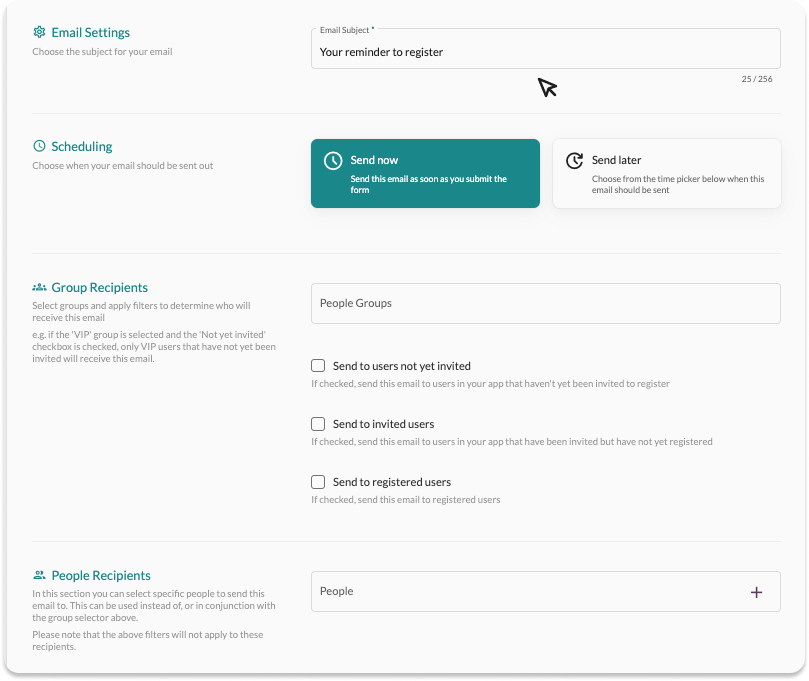
Next, set up the subject of the email, choose the recipients, and schedule when it should be sent.
Selecting Recipients #
In the ‘Recipients’ section, select the group of users from the ‘People Groups’ field. Then, using the checkbox options, select the relevant user statuses, which are:
- Users who have not yet been invited
- Users who were invited but have not yet registered
- Users who have registered
For example, if you wish to send accommodation details to VIPs who have registered, select ‘VIP’ from the ‘People Groups’ field and tick the ‘Send to Registered Users’ checkbox.
Sending a Blind Carbon Copy or Bcc on an email. #
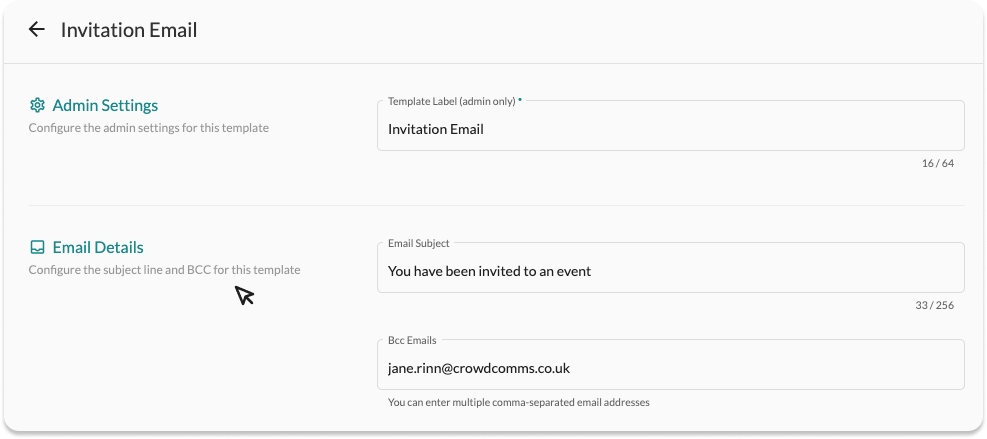
BCC stands for “blind carbon copy” and is an email feature that allows you to send a copy of an email to a recipient without the other recipients seeing their name. To use this feature in an email template, navigate to the email templates dashboard.
Go to the Registration tab, then select Email Templates. Choose the template you wish to send with a BCC, and click either Edit Template or Create New Template. This will open the admin configurations page where you can add your BCC recipients into the input box provided.
- Please note that BCC recipients will not be counted on the emails dashboard.
Editing the Email Template #
In the ‘Email Builder’ section, click the ‘Launch Email Editor’ button to either edit an existing email template or create a new one. Please refer here to learn how to use the email editor.
For more information on custom email domains please see here.