Overview #
This feature allows you to build a customised library of pages using our flexible modular page builder. You can easily design and organise these pages, then link them to your site’s header or add navigation buttons or links, providing a seamless user experience for your attendees.
Setting up a Custom Page #
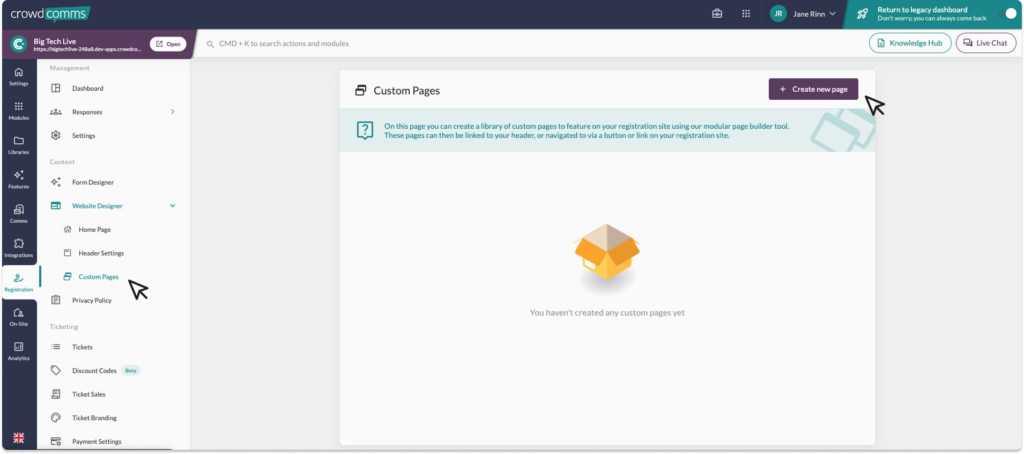
To create a custom page, navigate to the Registration tab on the CMS. Then in the secondary menu, select Website Designer, and then select Custom Pages. On the Custom Page screen, select the Create New Page button in the top right corner.
Page Type #
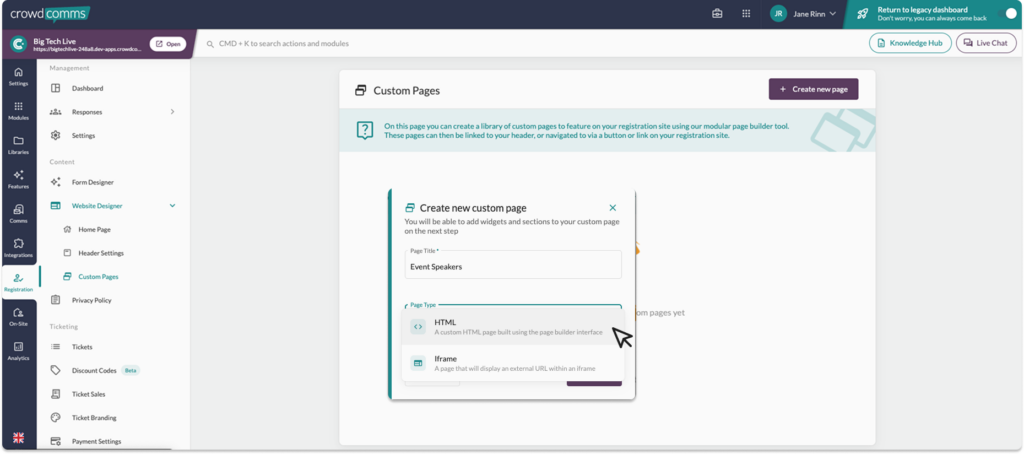
Upon selecting the Create New Page button, you will be presented with a pop up modal, where you can give your page a title and select the page type. There are two types of page:
- HTML: A custom HTML page built using the Page Builder Template Interface.
- iFrame: A page which will display an external URL within an iFrame.
Once you select your page type, you can choose a blank template, expand on an existing template, or, if you’ve selected iFrame, insert the URL of the site you wish to embed into your custom page. Then, click ‘Submit.
HTML Template #
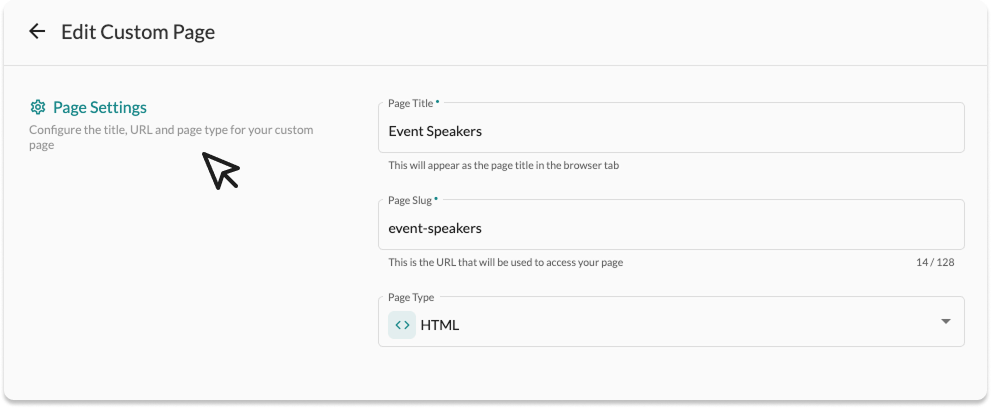
When you select submit after choosing the HTML template, you will be redirected to edit your custom page settings.
Page Settings #
On this page you can configure the page title, the URL, and page type for your custom page.
Below this is the custom page builder, click Open Page Builder to begin designing your website page.

Editing Your Template #
If you have selected a blank template, the builder will open to a blank screen with a left side bar, where you can add and edit sections of your page. The right side will show a preview of how your page will look once it’s live. Please note: the global header will sit on top of this page, and will not be show in this preview.
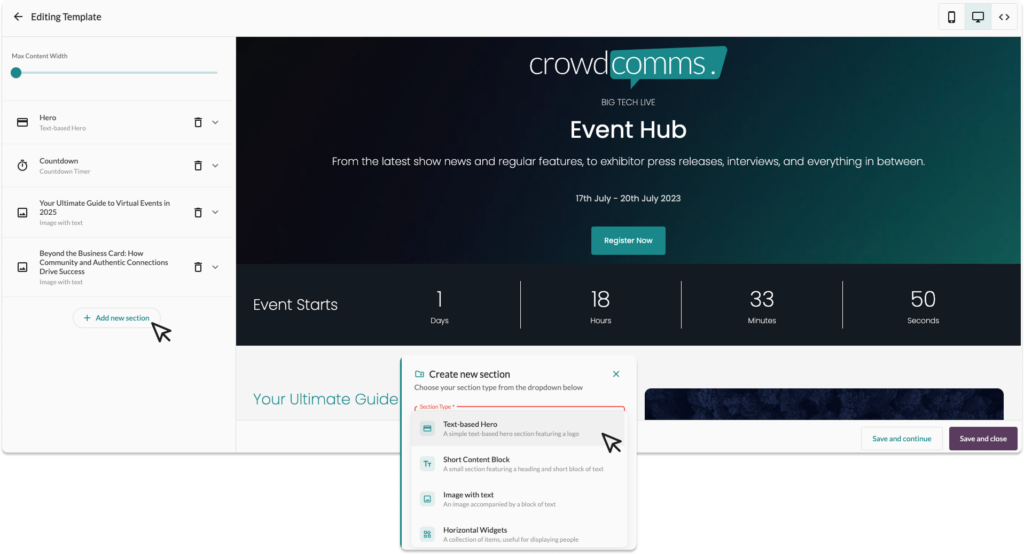
To add a section, select the Add New Section button and a modal will pop up. From here, select the section type you want from the drop down and give it a label, then select Submit. Your new section will now show in the left side bar, where you can customise and edit the design.
Sections #
- Text-based Hero: A simple text based hero section featuring a logo.
- A Short Content Block: A small section featuring a heading and short block of text.
- Image with Text: An image accompanied by a block of text.
- Horizontal Widgets: A collection of items, useful for displaying people.
- Custom HTML: Create a custom section with HTML & CSS.
- Page Header: A header with a logo, call to action and navigation links.
- Map Section: A full sized google map spanning full width.
- Countdown Timer: Add a live countdown for your registration or event.
- Stacked Widgets: A collection of stacked widgets, useful for displaying and agenda.
- Image Links: Ideal for displaying a show of sponsors.
Once you are happy with your design, don’t forget to hit Save.